
Hi lovelies! As you may know by now, I love to hack and reuse patterns that I like and am comfortable in. One of my all time favorites is the one and only Ogden Cami by True Bias which is great for summer, but also why not wear it in winter with some chunky jumper on? Who said it is weather inappropriate???
Today I want to share with you how easy is to add a button placket and give your Cami a little upgrade.
Button placket hack
First, you must decide which button you will use as this determine the width of the placket extension. Do not worry about the right color at this point. The most important aspect here is the size of the button you will be using…..You can always buy the right color later.
For this project I will be using a small buttons of 12mm in diameter.

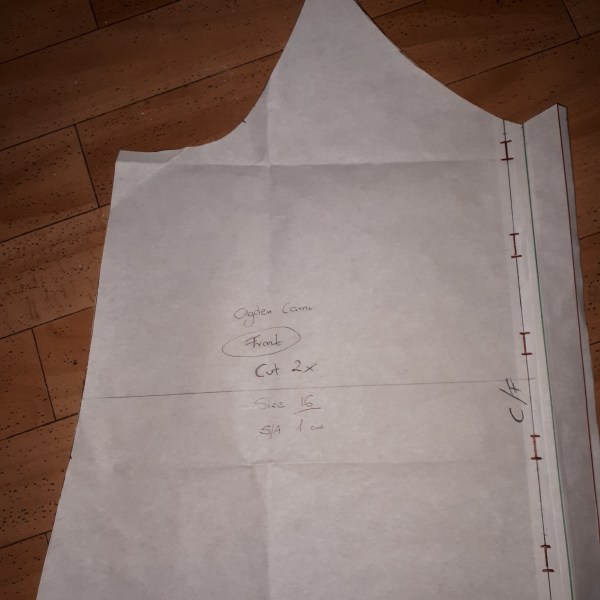
To begin, copy the front pattern piece with all necessary markings and notches but omit ON FOLD marking at the center front, as this will be cut as separates.
Once assembled the buttons will be placed on the center front as seen on the picture, so draw a line parallel to a center front 12 mm in width…..or the size of your button.


Next, we need to add a facing part to our extension, which is twice the size of the button diameter. In my case it is 24mm.

After that all you need to remember is to add some seam allowance.

To finish drafting the neckline simply cut along the seam allowance line and fold it twice, first along the seam allowance line and then the facing….same way as it will be sewn.
Take your tracing wheel and extend the neckline curve on the placket.


Once the pattern is open again it will give you a clear shape of the neckline. Draw a lines along the dots, extend the hemline and your are done drafting your pattern.

If you know how many buttons you will use it is easy at this stage to add a button holes markings to your pattern.
If you made this pattern before, you will know that the interfacing for front and back is quite substantial in width, so I decided to reduce it.
First, I copied front facing piece with all notches and markings.

Next, I draw a parallel lines 6cm away from original neckline and armhole curves.

To make this new edge easy to overlock I smoothed the line a little.

Cut it out remembering that the front piece is cut twice and not on fold.
I did exactly the same to the back facing piece, however this one is cut on fold as no changes had been made to the back piece.

You can follow above steps if you rather have the button placket on the back too. Giving you an option to change the look a bit 😉

I had used a fabric covered buttons because I think it looks really good on this fabric.

And this is how the facing looks from inside.

This Cami is my favorite so far, but it may change in the near future as I have many more hacks to try out….will keep you posted.
~Have a go at this simple pattern alternation and let me know what you think!~
Monika xxx


Pingback: Red Mimi blouse by Tilly and the Buttons – All Sew Petite