
Happy Easter !!! Hope you are having a well deserved break and enjoy yourselves!
I started my Easter weekend hand painting some eye masks for my partner which I had promised to do a while back, but as always am too selfish as I would rather make something for myself. With having a long weekend off from work I thought I should have enough time to do both.
This is not a first time that I am sewing eye mask and I can honestly say that it is a quick and easy make that can be customized in so many different ways. Every time I make one I try to decorate it using different and new to me techniques to see what I like better.
This time I decided to hand paint each eye mask with a different set of eyes of some manga/anime characters that my partner is a big fan of. I will not bore you too much about the details, but in case if you are interested and want to know where the inspiration is from I will mention it at the end.
Step by step tutorial
I had drafted this pattern based on my partner’s feedback. He likes to have a bigger eye mask then typically can be found in a shop. You can draft it yourself or use a ready pattern if you already have one.
This is a small project, hence it is best to use any fabric scraps that you may have in your stash which are otherwise too small for anything else.
I found enough white and brown cotton fabric in my scrap basket so I can make 3 eye masks. Natural fiber materials such as cotton are the best for dyeing and hand painting. But if you are going to skip this step then any fabric should be fine.
You need to cut two pattern pieces, one that will be a front-visible side, and one that will be a back- lining. I would make sure to pick the softest fabric as a lining because it gets in contact with your face and you want it to be comfortable.

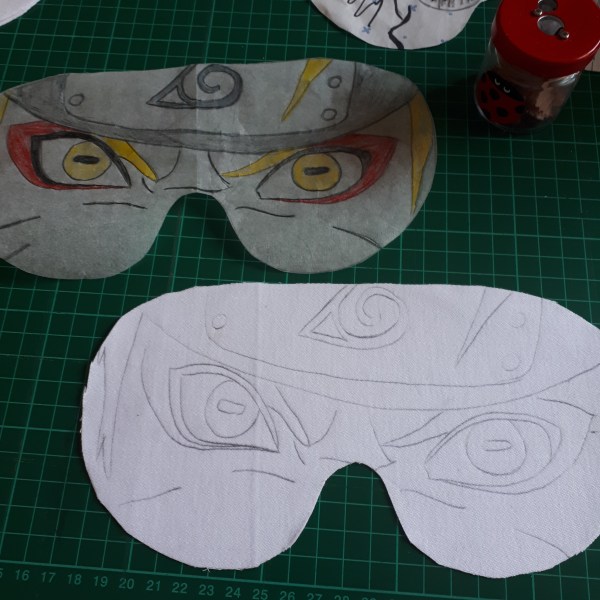
I like to drew my picture straight on the pattern to give me an idea of how the completed version will look like.

Using carbon paper transfer desired design onto a facing fabric if like me you are bad at drawing and color it with a fabric pen or a paint. I like to use Dylon fabric paint because it is durable, does not fade and is available in many colors.

When your paint is dry you can begin sewing your eye mask.
I like to make my eye mask nice, soft and squashy so will add a piece of batting to the mix.

Sandwich the batting between the two layers of fabric and pin in place to reduce fabric shifting.

Baste throughout all layers around the edges within your seam allowance.

Attach elastic or a ribbon at the sides on the back.

Starting at a side stitch a bias tape all around the mask on top of the creased line. Tip: fold the beginning of the tape inside to stop it from shedding with time and finish stitching on top of it for a clean finish.

Fold over the bias tape to the other side and baste it in place. Trim seam allowance in case if you see the first stitching line.

Top-stitch or hand stitch the tape in place. Give it a last final press and you are done!


Inspiration

Ryuk from Death Note

Naruto

Brook from One Piece


Pingback: Quick & easy eye mask – free sewing pattern – Allsewpetite